

Installation & Activation
Get Real Testimonials installed and licensed — the one-time setup you do before building anything.
Real Testimonials installs like any other WordPress plugin. This page covers the three things you only do once: installing the plugin, walking through the setup wizard, and activating your license. When that's done, head to the Quick Start to build your first showcase.
Before you start
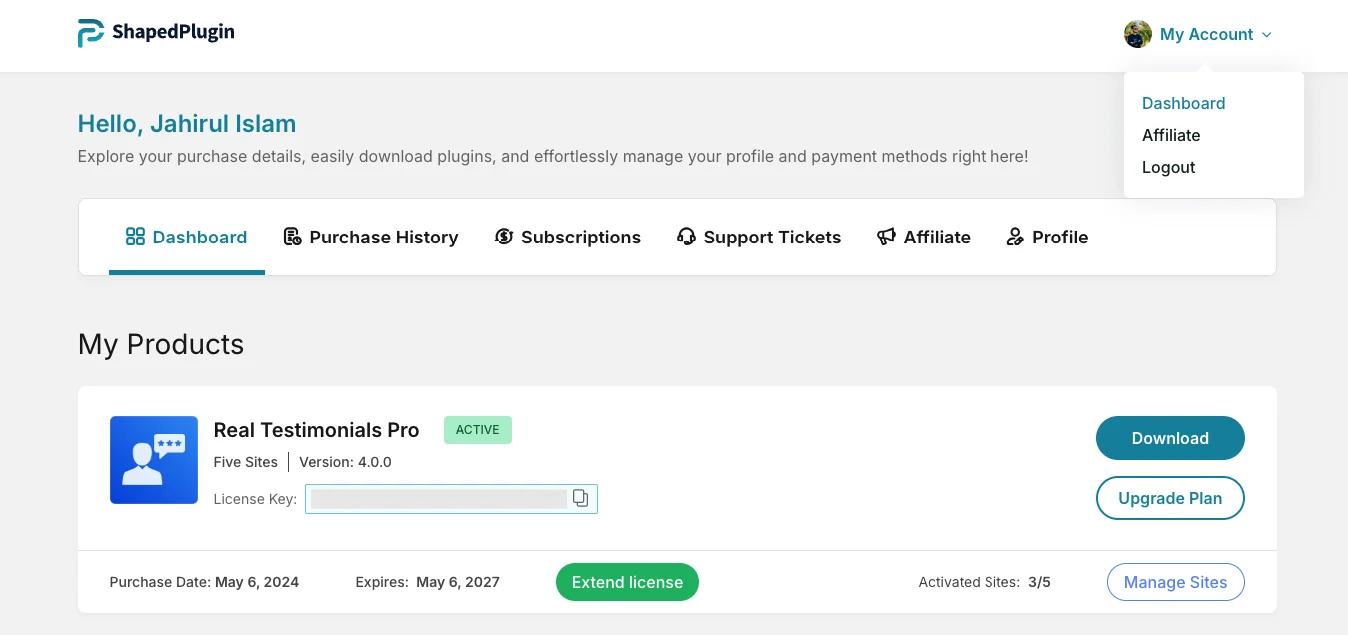
Check that your site meets the Requirements, and grab two things from your ShapedPlugin account: the plugin zip and your license key. Both live on your account's downloads page.
The zip file is named testimonial-pro-vX.X.X.zip, where X.X.X is the version number you're downloading — so your file might be testimonial-pro-v4.0.0.zip today and testimonial-pro-v4.1.0.zip after the next release. That's expected; just pick whatever zip your account offers.
1. Install the plugin
- Log in to your WordPress dashboard.
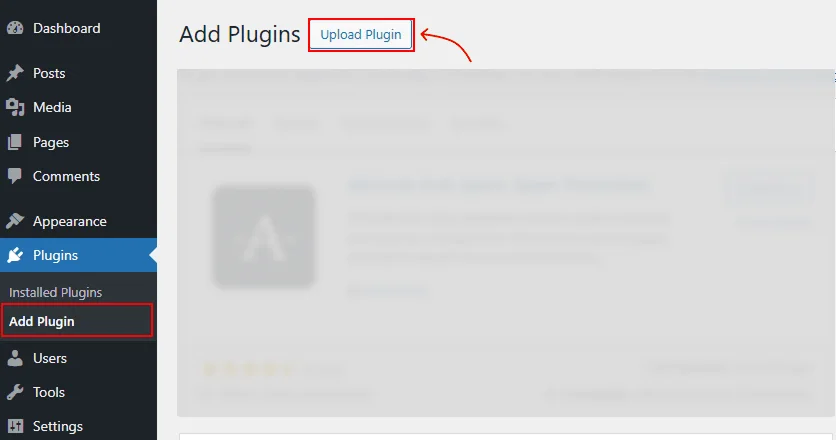
- Go to Plugins → Add New Plugin and click Upload Plugin at the top.
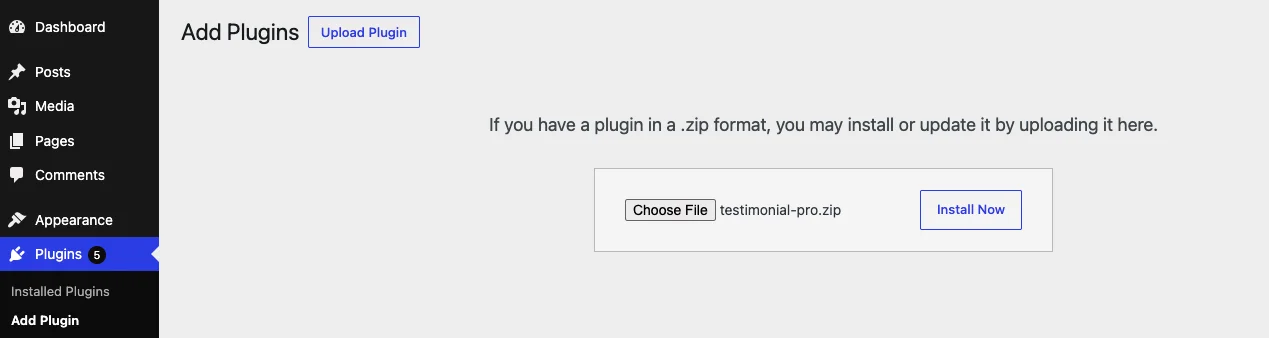
- Click Choose File, select the
testimonial-pro-vX.X.X.zipfile you downloaded from your ShapedPlugin account, and click Install Now.
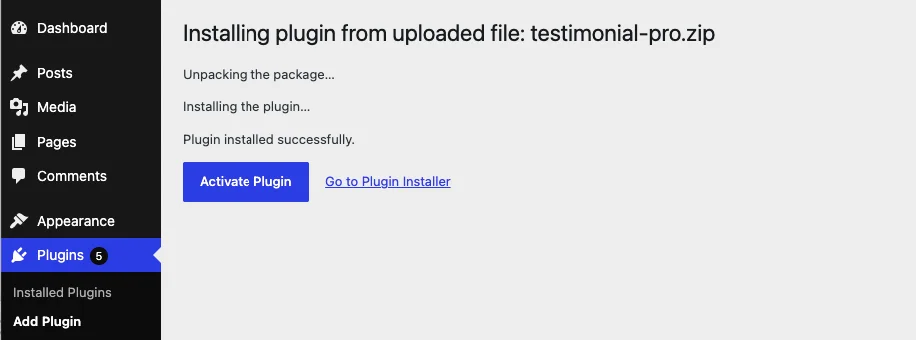
- When the upload finishes, click Activate Plugin.
Can't upload through the admin? Install via FTP instead
Some hosts cap upload sizes below the plugin's zip size. In that case: unzip testimonial-pro-vX.X.X.zip on your computer, upload the testimonial-pro folder it contains to /wp-content/plugins/ with your FTP client or your host's file manager, then activate the plugin from Plugins → Installed Plugins.
2. Walk through the setup wizard
The moment you activate the plugin, Real Testimonials opens its Setup Wizard — a short, four-step tour that gets the essentials out of the way:
- Welcome — a quick hello and overview.
- Blocks — choose which blocks show up in your editor. Not sure yet? Leave everything on; you can change this anytime from Dashboard → Blocks.
- License Key — paste your key and activate (details below). The wizard waits here — you can't finish setup until the license is active.
- Finish — you're done and ready to build.
If you skip or close the wizard, nothing is lost — the next time you open the plugin you land on the dashboard's getting-started screen, and every wizard choice has a matching setting in the dashboard.
3. Activate your license
Your license unlocks the plugin's features, automatic updates and support — and your testimonials only show up for visitors once the license is active. You can activate it right inside the setup wizard, or any time from the dashboard:
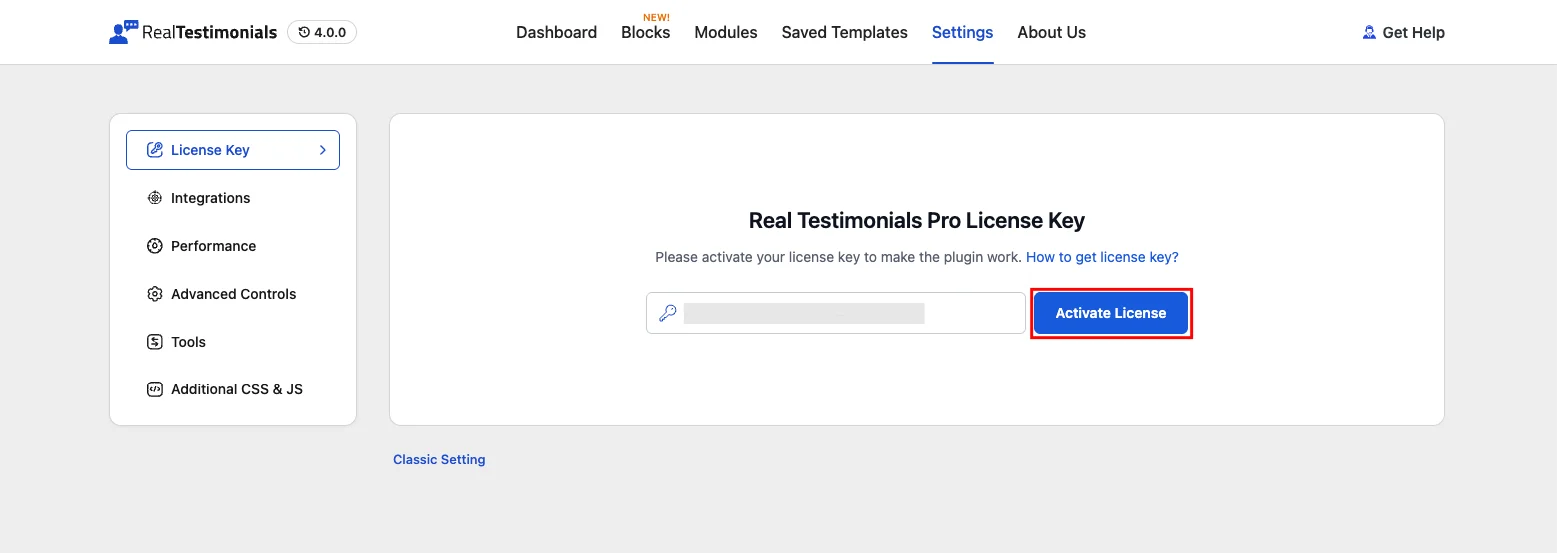
- Go to Real Testimonials → Settings in the admin sidebar. The dashboard opens with the License Key tab active.
- Copy your License Key from your ShapedPlugin account page.
- Paste the key into the field and click Activate.
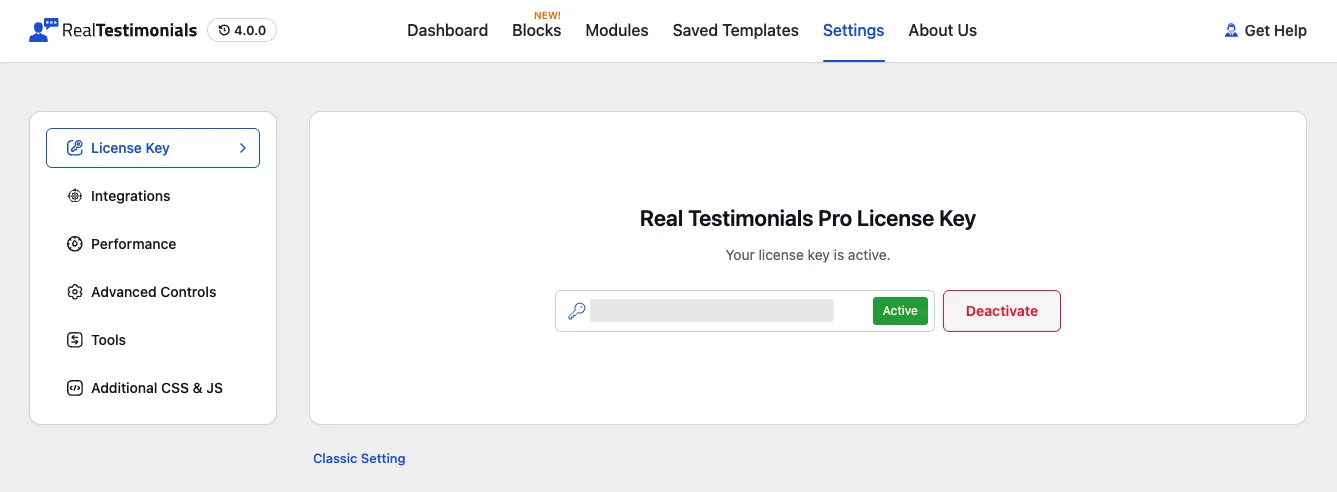
- Once active, the same tab shows your license status and a Deactivate button.
Moving to a new site?
Click Deactivate on the old site first to free up the activation, then activate the same key on the new one. Do this before retiring a staging or development site, too.
Activation not working?
- Check for typos — copy and paste the key rather than retyping it, with no spaces before or after.
- Check your license status in your ShapedPlugin account — an expired license needs renewing before it will activate.
- Activation limit reached? Deactivate the key on a site you no longer use, or upgrade your plan.
- Server can't reach the license service? Some hosts block your site from connecting out to other servers — ask your host to allow connections to
shapedplugin.com.
Updating the plugin
With an active license, updates arrive in Dashboard → Updates and on the Plugins screen like any other plugin — click Update Now when one appears. Your testimonials, blocks and settings are kept across updates.