

Classic Version Overview
The shortcode-based way to build testimonial showcases — made for page builders, the Classic Editor, and anyone who likes to set things up once and reuse them everywhere.
Real Testimonials has two ways to put testimonials on a page. The blocks you use right inside the WordPress editor — and the classic version, where you build a layout on its own admin screen and place it anywhere with a shortcode (a tiny code in square brackets, like [example], that you paste where the content should appear).
If you build your pages with Elementor, Divi, WPBakery, Beaver Builder, Bricks or Oxygen, or you're on the Classic Editor, this is your path — a shortcode drops into any of them. And don't worry about picking "wrong": both versions read from the same testimonials, so you can switch between them any time without redoing your content.
What the classic version gives you
Three pieces, and you'll use them in this order:
| Piece | What it does | Where it lives |
|---|---|---|
| Testimonials | The reviews themselves — the person, their quote, rating and photo. Shared with the block version. | Real Testimonials → All Testimonials |
| Views | Saved display layouts. Pick from eight layout presets, choose which testimonials show, style everything — then place it by shortcode. | Real Testimonials → Manage Views |
| Testimonial Forms | Front-end submission forms visitors use to send you reviews — also placed by shortcode. | Real Testimonials → Testimonial Forms |
The workflow, start to finish
1. Add a few testimonials
Everything starts with content. Add each review — the reviewer's name, quote, star rating, photo and more — under Real Testimonials → All Testimonials. The Add New Testimonial guide walks through every field.
Testimonials are shared across the whole plugin, so anything you add here works in classic Views and blocks alike.
2. Build a View
A View is a saved testimonial layout. Go to Real Testimonials → Manage Views, click Add New, and pick one of eight layout presets — Slider, Thumbnails Slider, Carousel, Multi-row, Grid, Masonry, List or Isotope (a filterable grid).
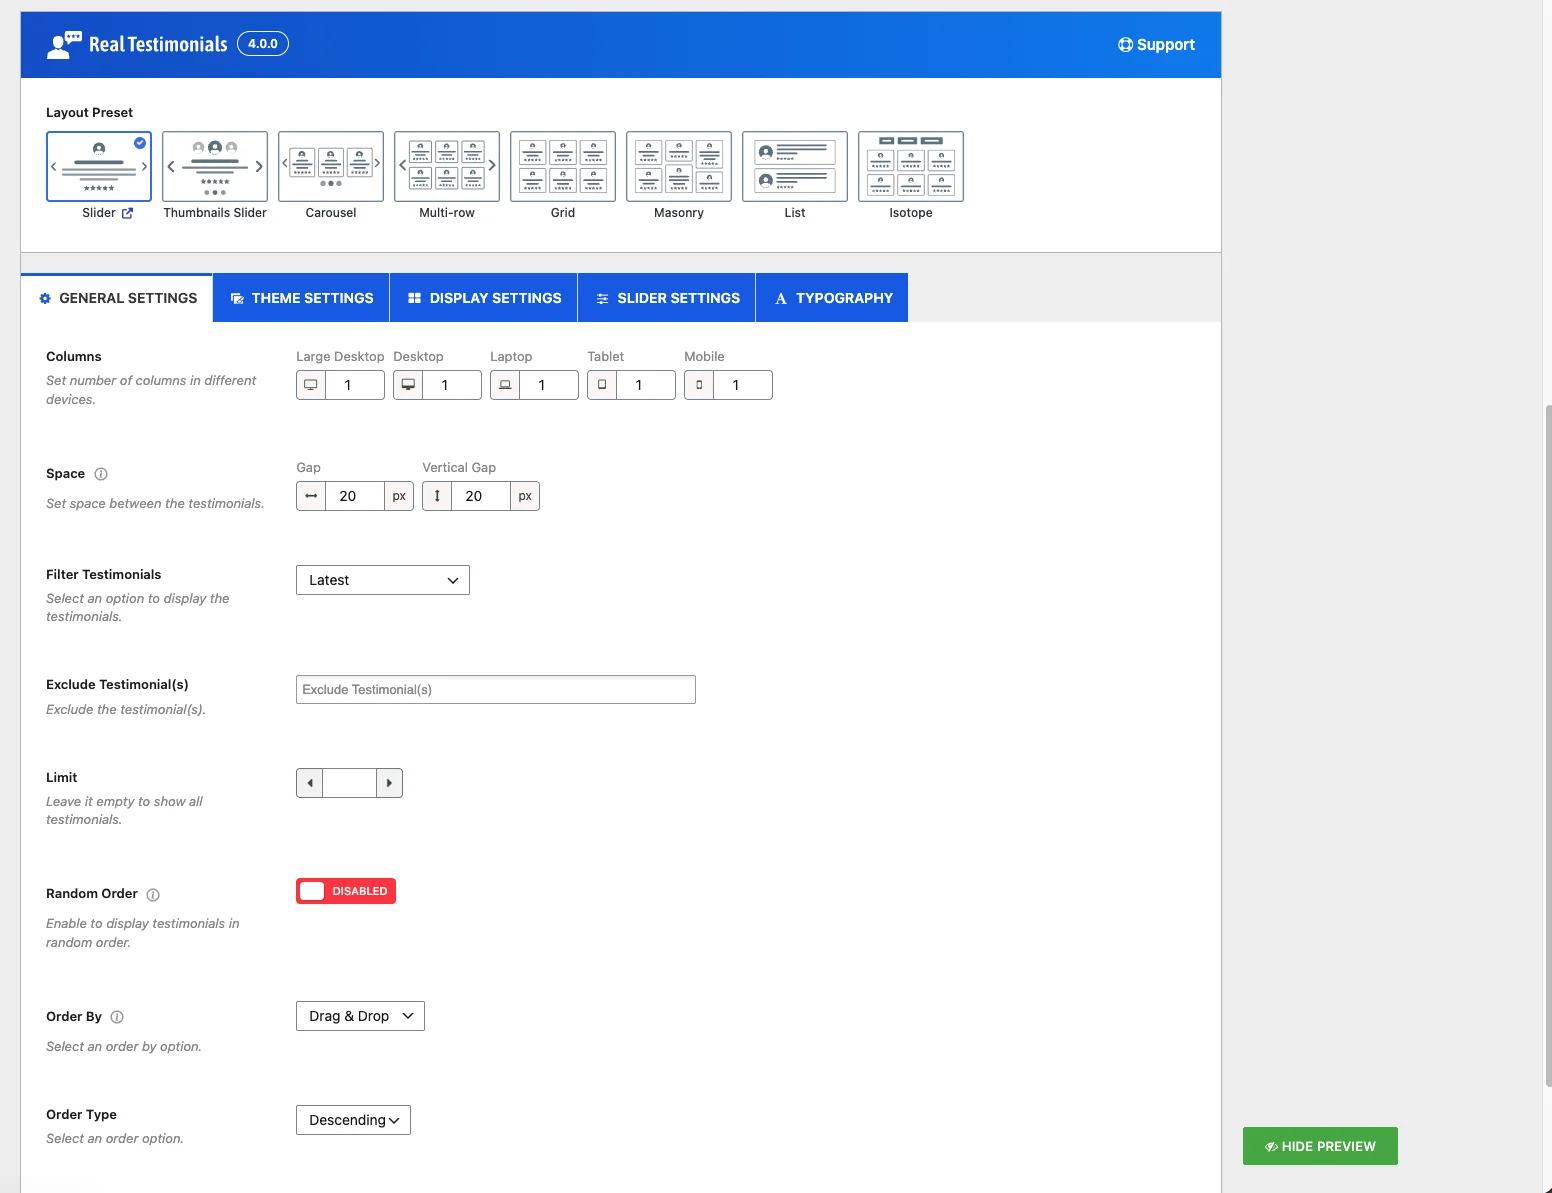
Below the layout picker, the Shortcode Options tabs control everything else: which testimonials appear, columns and spacing, slider behavior, colors and typography. A Live Preview at the top shows the result as you go, so you're never designing blind.
The Manage Views guide covers every setting; Layout Presets tours each layout with live demos.
3. Copy the shortcode
When you publish a View, it hands you a shortcode like:
[sp_testimonial id="123"]There's a copy button right on the edit screen, and another next to every View in the Manage Views list.
4. Paste it anywhere
Drop the shortcode into any page, post, widget, or page-builder text element. Edit the View later and every page using its shortcode updates at once — that's the real power of building it once.
Working in the block editor?
The Real Testimonials Shortcode block lets you pick a View from a dropdown — no copying and pasting at all.
Collecting reviews the classic way
Rather than typing every review in yourself, let customers send them. Testimonial Forms builds a customizable front-end form — fields, labels, styling, spam protection — that you place with its own shortcode ([sp_testimonial_form id="123"]). New submissions arrive as pending, so nothing goes live without your approval.
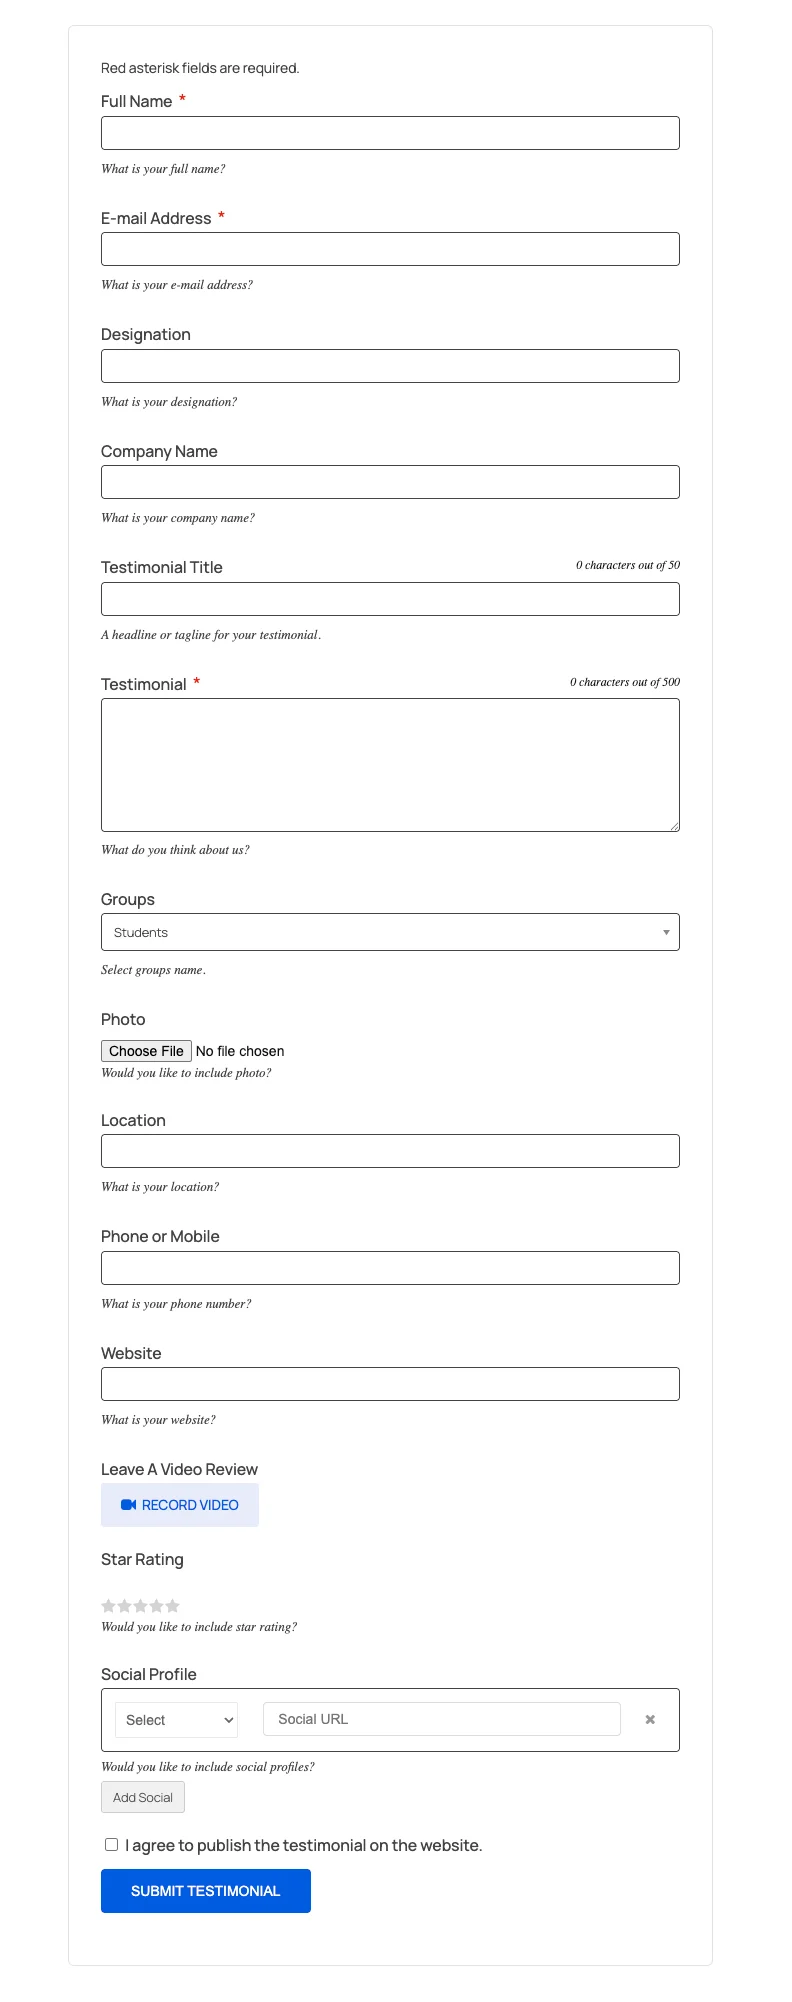
The full guide: Testimonial Forms.
Shortcodes at a glance
| Shortcode | What it places |
|---|---|
[sp_testimonial id="123"] | A saved View — your testimonial showcase. |
[sp_single_testimonial id="45"] | One individual testimonial by its ID. |
[sp_testimonial_form id="123"] | A testimonial submission form. |
Classic or blocks — which should you use?
Honestly, whichever fits how you build pages. A quick gut check:
- Use classic if you build with a page builder, use the Classic Editor, or want one layout reused across many pages that updates everywhere from a single edit.
- Use blocks if you work in the block editor and want to design visually in place — see the Blocks Overview.
You can also set your preference under Dashboard → Settings (Default Editor), and mix freely — a classic View on one page, blocks on another, same testimonials behind both.
Where to go next
- Add New Testimonial — create the reviews your Views will display.
- Manage Views — the complete Views reference.
- Layout Presets — see all eight layouts with demos.
- Testimonial Forms — collect reviews from visitors.