

Admin Dashboard
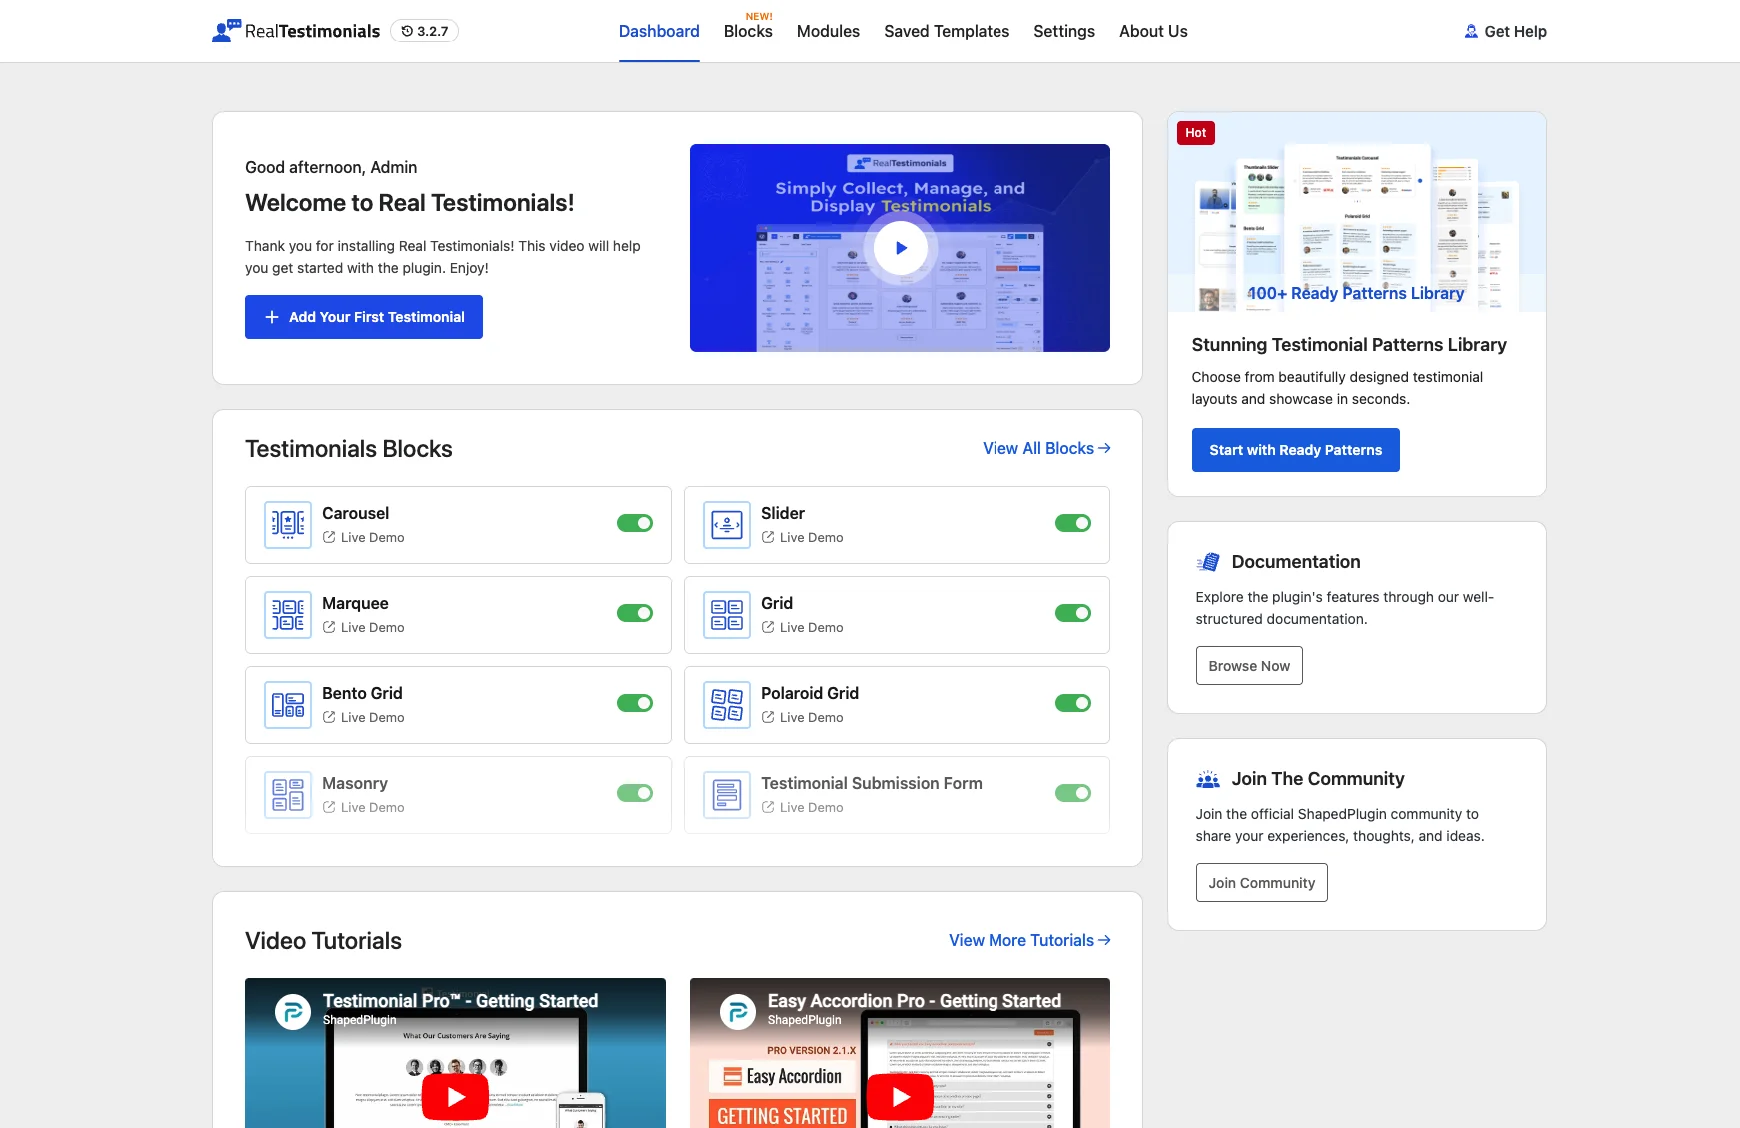
The Real Testimonials dashboard is the plugin's control panel inside the WordPress admin. It's where you turn blocks (the ready-made testimonial elements you drop into a page) and feature modules (plugin-wide features) on or off, manage saved templates, set up integrations, adjust settings, and activate your license.
How to open it
- Activate the plugin (see Installation & Activation).
- In the WordPress admin sidebar, open Real Testimonials → Getting Started.
- The dashboard opens on the Dashboard (getting started) screen.
Direct links
Each section has its own URL hash — #blocks, #modules, #saved_templates, #settings, #about_us, even #setupwizard — so you can bookmark or share a link that opens directly on a section. Settings tabs go one level deeper: #settings=performance opens the Performance tab straight away.
Where everything lives in the admin menu
The Real Testimonials menu in the WordPress sidebar has more entries than just the dashboard. If you're ever unsure where something is, this is the map:
| Menu item | What it opens |
|---|---|
| All Testimonials | The list of your testimonials. A small badge shows how many are pending review — handy when you collect submissions from visitors. |
| Add New | Create a single testimonial. |
| Manage Views | The classic shortcode builder — saved Views you place with the Real Testimonials Shortcode block or a shortcode. |
| Testimonial Forms | Classic submission forms (the block-based Submission Form lives in the editor instead). |
| Groups | The categories your testimonials are organized into. |
| Getting Started | This dashboard. |
| Blocks | Jumps straight to the dashboard's Blocks section. |
| Saved Templates | Jumps to Saved Templates — only shown while that module is enabled. |
| Settings | Jumps to the dashboard's Settings section. |
Dashboard (Welcome) page
The main dashboard page is your getting-started hub. It greets you by time of day and puts what you'll want on day one right up front: your first testimonial, patterns, and tutorials.
Welcome section
At the top, a welcome message appears alongside a video tutorial. Click the play button and the introduction opens in a lightbox overlay. Below it, an Add Your First Testimonial button opens the template editor with the block inserter ready.
Patterns Library card
A highlighted card points you to the 100+ Ready Patterns Library — pre-built testimonial layouts you can drop in and customize instead of designing from scratch. Click Start with Ready Patterns to browse the collection.
Quick blocks toggles
The Testimonials Blocks section shows the eight display blocks (Carousel, Slider, Marquee, Grid, Bento Grid, Polaroid Grid, Masonry and Submission Form) as toggle cards, each with a Live Demo link. Turn any of them on or off right here without opening the full Blocks page. Click View All Blocks to see everything, including the child blocks.
Video Tutorials
Two embedded YouTube videos play directly on the page:
- How to Use Real Testimonial Blocks in Gutenberg Editor
- How to Use Real Testimonial Blocks in Elementor, Divi & More
Click View More Tutorials to open the full playlist on YouTube.
Documentation & Community
The sidebar shows cards linking to:
- Documentation — Full plugin docs at realtestimonials.io/docs
- Join The Community — ShapedPlugin's community portal for sharing feedback
The Setup Wizard
When you activate the plugin without an active license — and haven't been through the wizard before — a short Setup Wizard opens and walks you through four steps — Welcome → Blocks → License Key → Finish. (If your license is already active, or you've visited the wizard once, activation takes you straight to the dashboard instead.)
- Welcome — a quick tour of what the plugin can do, with an intro video. You can Skip it here if you're in a hurry.
- Blocks — "Enable the Blocks You Need": the same toggle grid as the Blocks page, so you start with only the blocks you'll use. You can change this any time later.
- License Key — activate your license. This step is skipped automatically if your license is already active.
- Finish — jump straight in with Add Your First Testimonial or Go to Dashboard. This step also offers an optional diagnostic-data sharing checkbox, plus an Explore all Patterns banner pointing to the 500+ ready patterns collection.
You can relaunch the wizard any time from the Get Help menu in the header (see below).
Diagnostic-data notice
If you skip the wizard's data-sharing checkbox, you may see it again later: about a week after your license activates, a dismissable admin banner asks once whether you'd like to share non-sensitive diagnostic data. Choose allow or deny and it won't ask again.
Navigating between sections
A navigation bar sits at the top of the dashboard. Click any item to switch sections — the page swaps instantly, no reload needed.
| Section | What it does |
|---|---|
| Dashboard | Getting-started page with guides, quick actions and support links. |
| Blocks | Enable or disable the blocks available in the editor. (Currently wears a "NEW!" badge.) |
| Modules | Turn feature modules on or off across the whole plugin. |
| Saved Templates | Manage your saved block templates. (Hidden if the Saved Templates module is off.) |
| Settings | License, integrations, performance, advanced controls, tools and custom code. |
| About Us | ShapedPlugin's other WordPress plugins (WP Carousel, Easy Accordion, Smart Tabs, and more), in case you need a related tool. |
Header shortcuts
Two shortcuts live in the header on every dashboard screen:
- Get Help — a dropdown with all the support links:
- Documentation — this docs site.
- Technical Support — open a support ticket with the ShapedPlugin team.
- Setup Wizard — relaunch the guided setup described above.
- Request a Feature — tell the team what you wish the plugin did.
- Video Tutorials — the getting-started video on YouTube.
- What's New — the public changelog on the plugin site.
- Blog: Latest News and Join Community — ShapedPlugin's blog and community forum.
- Version number — the small chip next to the logo shows which plugin version you're running. Click it and the Latest Updates – Changelog panel slides out so you can read release notes without leaving the dashboard.
A small chat bubble (powered by Crisp) may also appear in the corner for live support, depending on your setup.
Classic settings
Some legacy options live on the classic settings screen, used mainly by the shortcode-based Views system. A Classic Setting link on the Settings page opens it. That's where you can rename the "Testimonial" and "Group" menu labels, control exactly which CSS/JS assets the plugin loads, and set a cache lifetime — see Settings → The classic settings screen for the full rundown.